One handed 4 way cut

I first wrote this up in some lecture notes in 2001.  I figure it is time to get it online.

On one of my business trips to San Diego, I visited Brad Burt's Magic shop.  Brad showed my a one-handed multiple cut that he had worked out by studying a classic Houdini poster. Later on an airplane home I played around with multiple one-handed cuts and came up with this one.  It is a four way cut.  The criteria I gave myself was that it had to be a true cut with each of the four packets ending in a different position.  You can see a video of the cut below the tutorial.

By the way, I think this was the Houdini poster:

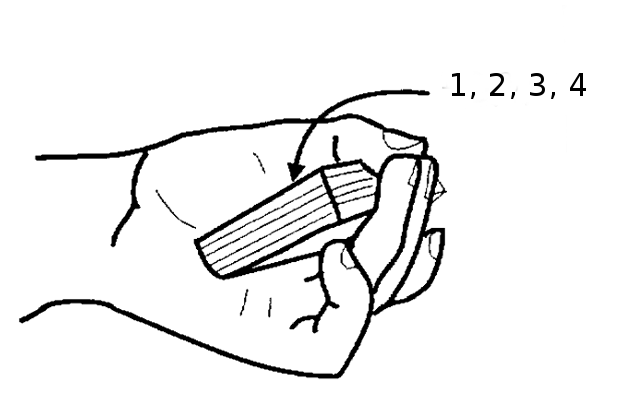
Start with the deck in your left hand, with the left edge of the deck on the base of the fingers. The deck should be positioned so you can reach across it with your left thumb.

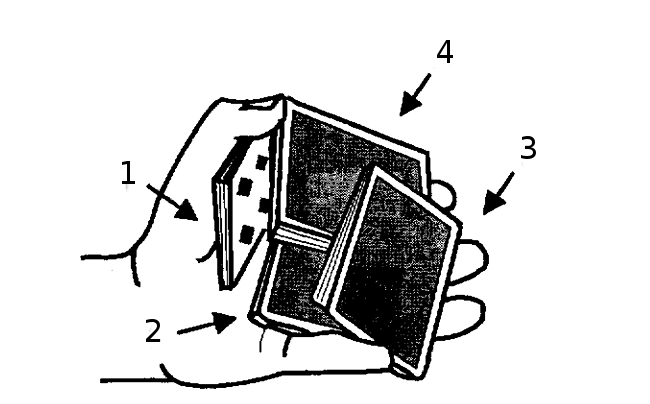
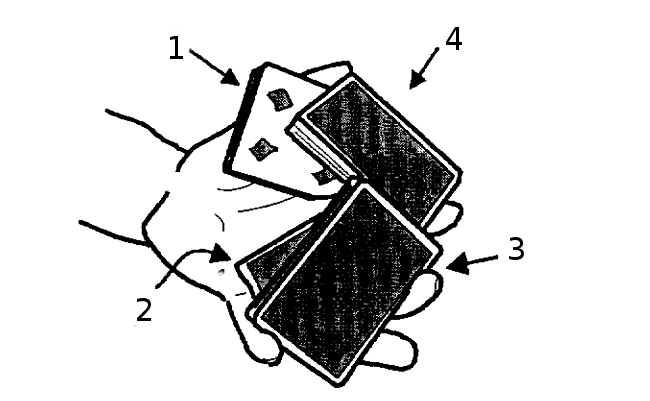
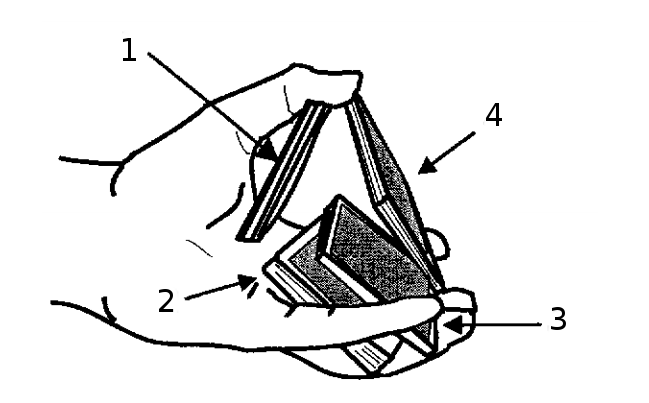
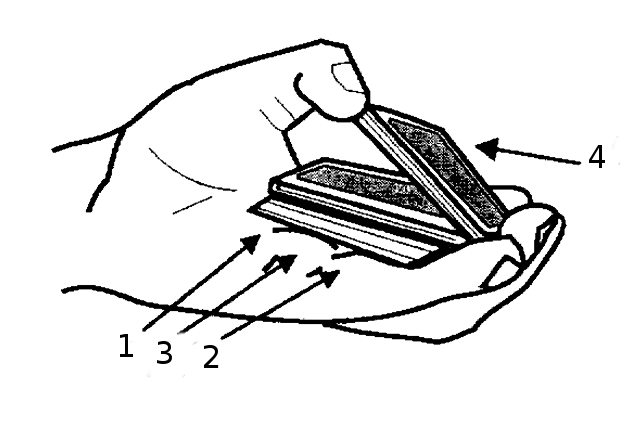
The following description refers to the blocks of cards numbered 1, 2, 3 and 4. These are the packets being manipulated from the top down.  The top most packet being number 1.

Reach over the deck with the thumb and open the deck as in a reverse Charlier cut.  At this point the left hand is controlling two blocks of cards. Take your left little finger and first finger and place them under the lower block, pinching the block between those two fingers and the middle fingers. Lever up teh block into a vertical position.

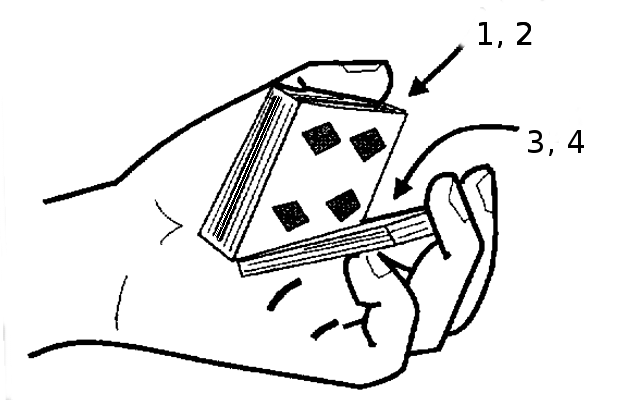
Now you have two groups of cards.  Packets 1 and 2 are under the thumb and packets 3 and 4 are pinched in the fingers.  Release a little thumb pressure (slightly bending the top joint of the thumb) to allow a small block of cards to fall from the thumb block into your hand.  This is packet 2.

Now the fun begins.  Lower the tip of the thumb onto the edge of the cards held by your fingers. Hold the cards with your thumb and shift the little finger and first fingers to a straddle position.  If you can, try to straddle both the block of cards in the palm and the cards at the fingers.  If you do, you will have complete control of three blocks of cards and will be able to turn you hand over without dropping any of the cards.

(Pause now and take the time to pick up the cards that have undoubtedly fallen to the floor)

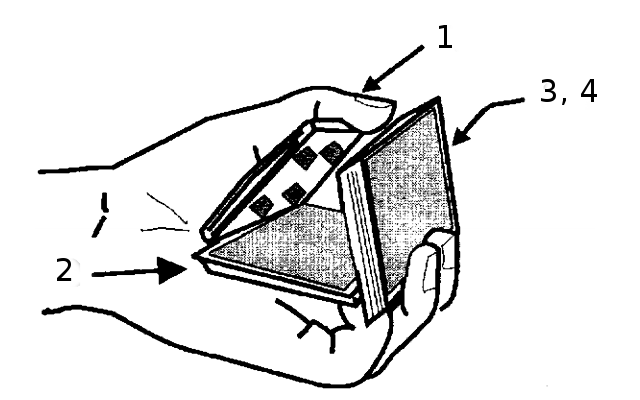
Assuming that you still have control of the cards... Your thumb is still holding its cards (packet 1).  Slide the thumb back alone the edge of the straddle gripped cards (packets 3 and 4) to the inner left corner. Pull down about half of the finger block of cards.

Move your thumb to the corner near your little finger of packet 4. You are going to pivot that packet around your first finger, until it is about 90 degrees to packet 3.  At this point you have control of four packets of cards, or cards all over the floor.  Let's be optimistic and assume that you have control of the four packets.

Packet 1 is being held between the base of the thumb and the tip of the thumb. Packet 2 is being held in a straddle grip between the base of your little finger and your first finger.  Packet 3 is straddled between the tip of your first finger and little finger.  Packet 4 is held between the tip of your thumb and the tip of your first finger.

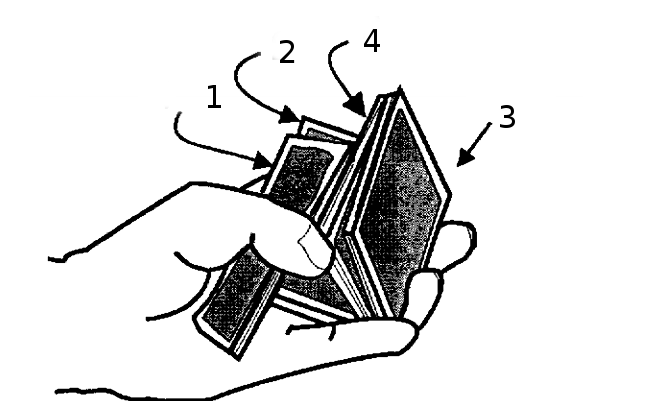
To reassemble the packets, straighten and flatten the hand, stretching the fingers wide.  As you do, packet 3 will clear the end of packet 4, and packet 3 will fall onto packet 2.  Squeeze packet 3 back onto packet 2.  Relax the hand, bringing the thumb in from the outstretched position, back inward and let packet 1 fall on top of packets 2 and 3.  Then let packet 4 fall on top of all the cards.

Dropping packet 1.

Dropping packet 4.  The deck has gone from 1, 2, 3, and 4 order to 4, 1, 3, 2 order.

Leave a Reply

Your email address will not be published. Required fields are marked *